You could always make your own...
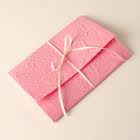
Now you can of course always make your own invitation. Start by making your own paper, I would stick with all white so that you can dye it with your wedding color. You can add different kinds of plants and sand to your paper to give it a certains look. Straw, grass, sand, leaves all create movement and texture giving your paper beautiful uniqueness. Once you've blended and press dried your paper you can leave it open face, single fold, or tri-fold. I wouldn't do anymore than that. Print out your info from your computer and attach it to your homemade paper, you can glue it or I really love those little brads that are popular with scrapbooking, they come in all different shapes and colors. Once the information is on, the fun stuff can begin. Go crazy get dried flowers, stickers, die cuts, glitter, or my favorite fancy dainty ribbons. Lay the ribbon along the edge of the info insert and glue it down make sure you use a clear dry glue as to not see the glue in the finished product. Now to close the invitation can be simple or creative as you want. You can use a number of things to tie it closed or if you left it open faced you can punch a hole in the top with a hole punch and loop some attractive ribbon through there. You will have to either make an accompanying RSVP card or do a telephone RSVP, you will also need envelopes and of course stamps. Handmade invitations are so sweet and elegant. I give this DIY a B+.
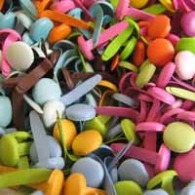
Scrapbooking Brads
